
Combine the flexibility of JavaScript with the user experience of native applications by creating Progressive Web Applications with Angular.
In this tutorial we’ll build an Angular application, walk through the steps to make it a Progressive Web Application (PWA) and then deploy it using Netlify to use the application on a mobile device.
You can use the GitHub repository for reference and code along as we go through the process of building an Angular PWA from scratch.
If you’re new to Angular, you may find it helpful to check out my articles on Computer Setup for Angular Development and Getting Started with Angular CLI before starting.
Build the Angular App
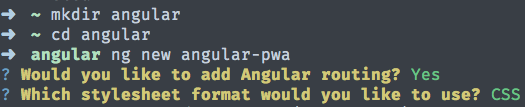
To begin building our Angular application, open your terminal and make a new directory (or choose an existing one) where you want to create the application (app). Then use the following Angular CLI command to create a new Angular app:
ng new angular-pwaChoose Yes for Angular Routing and CSS for stylesheet format.
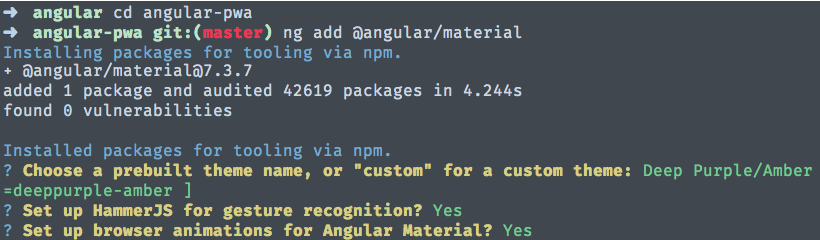
We’ll use Angular Material to handle the look, layout, and accessibility of our app. Go into the angular-pwa directory you just created and add Angular Material:
cd angular-pwang add @angular/materialChoose a color theme and answer Yes to add HammerJS and browser animations.
You can take a look at the boilerplate Angular application in your web browser by running:
ng serve -o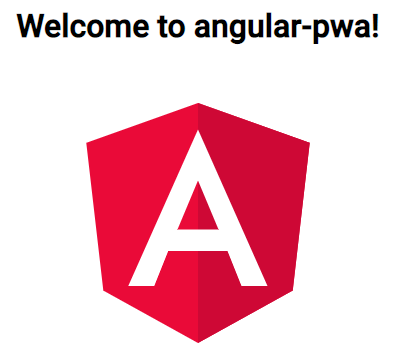
The app should load in your default browser and look something like this.
The app we’re building will let users view Technology and JavaScript news headlines. Since users will need to navigate between the two, lets add navigation with Angular Material by running:
ng g @angular/material:material-nav --name navbarWe’ll get our content from the NewsAPI. You’ll need a key to access the api so head on over to the NewsAPI website and sign up as a Developer to get a free key.
Once you have your NewsAPI key, lets create the service provider for our app by running:
ng generate service services/newsapiThis will create a new services subdirectory with boilerplate files inside it. Fire up the code editor of your choice and open the newsapi.service.ts file you just created in angular-pwa/src/app/services/
We want to setup two API endpoints; one for Technology News and another for JavaScript News. The NewsAPI Documentation shows how to format the http endpoints. Here’s what we’ll use:
https://newsapi.org/v2/top-headlines?category=technology&language=en&country=us&apiKey=

https://newsapi.org/v2/everything?q=javascript&sortBy=latest&apiKey=
Now use the code below to edit the newsapi.service.ts file. We’ll add HttpClient and Observable to our imports, and create functions to get the news articles from our API endpoints.
Be sure to put in your NewsAPI key on the line:
_api_key = ‘YOUR NEWSAPI KEY GOES HERE’_import { HttpClient } from '@angular/common/http';
import { Injectable } from '@angular/core';
import { Observable } from 'rxjs';
import { map } from 'rxjs/operators';
@Injectable({
providedIn: 'root'
})
export class NewsapiService {
api_key = 'YOUR NEWSAPI KEY GOES HERE';
constructor(private http: HttpClient) {}
getArticlesTechnology(): Observable<any> {
return this.http
.get(
'https://newsapi.org/v2/top-headlines?category=technology&language=en&country=us&apiKey=' +
this.api_key
)
.pipe(map((data: any) => data.articles));
}
getArticlesJavaScript(): Observable<any> {
return this.http
.get(
'https://newsapi.org/v2/everything?q=javascript&sortBy=latest&apiKey=' +
this.api_key
)
.pipe(map((data: any) => data.articles));
}
}To use our new service provider we need to add it and HttpClientModule to our app.module.ts file. Open and edit the app.module.ts file.
import { LayoutModule } from '@angular/cdk/layout';
import { HttpClientModule } from '@angular/common/http';
import { NgModule } from '@angular/core';
import {
  MatButtonModule,
  MatCardModule,
  MatIconModule,
  MatListModule,
  MatSidenavModule,
  MatToolbarModule
} from '@angular/material';
import { BrowserModule } from '@angular/platform-browser';
import { BrowserAnimationsModule } from '@angular/platform-browser/animations';
import { AppRoutingModule } from './app-routing.module';
import { AppComponent } from './app.component';
import { ArticlesTechnologyComponent } from './articles-technology/articles-technology.component';
import { NavbarComponent } from './navbar/navbar.component';
import { NewsapiService } from './services/newsapi.service';

@NgModule({
  declarations: [AppComponent, NavbarComponent, ArticlesTechnologyComponent],
  imports: [
    BrowserModule,
    AppRoutingModule,
    BrowserAnimationsModule,
    HttpClientModule,
    LayoutModule,
    MatToolbarModule,
    MatCardModule,
    MatButtonModule,
    MatSidenavModule,
    MatIconModule,
    MatListModule
  ],
  providers: [NewsapiService],
  bootstrap: [AppComponent]
})
export class AppModule {}
Now create a new component to display the Technology News by running:
ng g c articles-technologyHead back to your code editor and you’ll see the new articles-technology directory we created — as well as the navbar directory we made earlier.
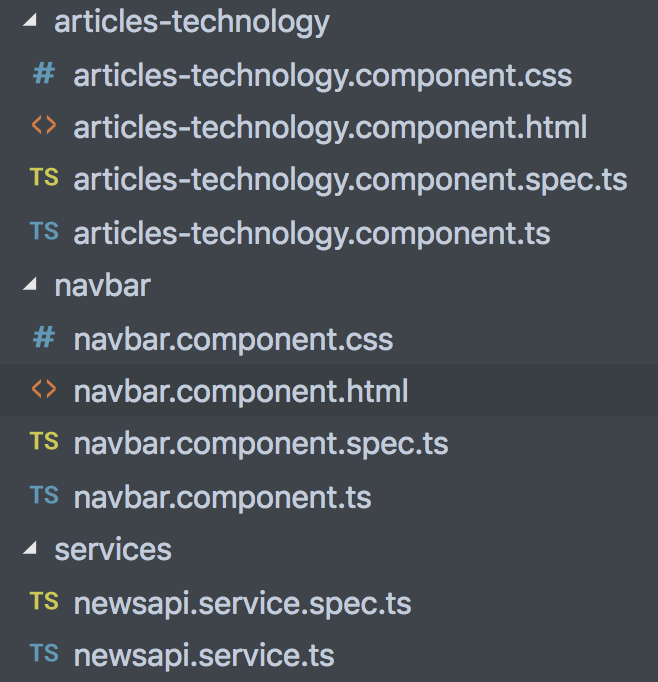
Open the articles-technology.component.ts file and edit it to add our NewsAPI service and create the array for the Technology News articles.
import { Component } from '@angular/core';
import { Observable } from 'rxjs';
import { NewsapiService } from '../services/newsapi.service';

@Component({
  selector: 'app-articles-technology',
  templateUrl: './articles-technology.component.html',
  styleUrls: ['./articles-technology.component.css']
})
export class ArticlesTechnologyComponent {
  articles$: Observable<any>;

  constructor(private newsapi: NewsapiService) {}

  ngOnInit() {
    // technology news articles
    this.articles$ = this.newsapi.getArticlesTechnology();
  }
}
Next open the articles-technology.component.html file and delete all the boilerplate code that was added when the CLI created it. Edit the file to display the Technology News articles from our service provider.
<mat-card *ngFor="let article of articles$ | async">
  <mat-card-header>
    <mat-card-title class="title">{{ article.title }}</mat-card-title>
    <mat-card-subtitle>{{ article.source.name }}</mat-card-subtitle>
  </mat-card-header>
  <img
    mat-card-image
    class="img-article"
    src="{{ article.urlToImage }}"
    alt=""
  />
  <mat-card-content>
    <p>
      {{ article.description }}
    </p>
  </mat-card-content>
  <mat-card-actions class="action-buttons">
    <a mat-button color="primary" href="{{ article.url }}">
      <mat-icon>description</mat-icon> Full Article
    </a>
  </mat-card-actions>
</mat-card>
Let’s see how that looks. Open the app.component.html file, delete all the boilerplate code and add the articles-technology component:
<app-articles-technology></app-articles-technology>Save your files and view the app in your browser to see the Technology News being displayed. Now we need to create the JavaScript News component and format our navigation.
In your terminal, create a new component to hold our JavaScript News content:
ng g c articles-javascriptAs we did with the articles-technology component files, first we’ll edit the articles-javascript.component.ts:
import { Component, OnInit } from '@angular/core';
import { Observable } from 'rxjs';
import { NewsapiService } from '../services/newsapi.service';

@Component({
  selector: 'app-articles-javascript',
  templateUrl: './articles-javascript.component.html',
  styleUrls: ['./articles-javascript.component.css']
})
export class ArticlesJavascriptComponent implements OnInit {
  JSarticles$: Observable<any>;

  constructor(private newsapi: NewsapiService) {}

  ngOnInit() {
    // javascript news articles
    this.JSarticles$ = this.newsapi.getArticlesJavaScript();
  }
}
And then edit the articles-javascript.component.html file:
<mat-card *ngFor="let article of JSarticles$ | async">
  <mat-card-header>
    <mat-card-title class="title">{{ article.title }}</mat-card-title>
    <mat-card-subtitle>{{ article.source.name }}</mat-card-subtitle>
  </mat-card-header>
  <img
    mat-card-image
    class="img-article"
    src="{{ article.urlToImage }}"
    alt=""
  />
  <mat-card-content>
    <p>
      {{ article.description }}
    </p>
  </mat-card-content>
  <mat-card-actions class="action-buttons">
    <a mat-button color="primary" href="{{ article.url }}">
      <mat-icon>description</mat-icon> Full Article
    </a>
  </mat-card-actions>
</mat-card>
Now that we have our Technology News and JavaScript News components, we’ll add our navigation. First we’ll add routing by editing the app-routing.module.ts file to import our components and construct paths to them.
import { NgModule } from '@angular/core';
import { RouterModule, Routes } from '@angular/router';
import { ArticlesJavascriptComponent } from './articles-javascript/articles-javascript.component';
import { ArticlesTechnologyComponent } from './articles-technology/articles-technology.component';

const routes: Routes = [
  { path: 'articles', component: ArticlesTechnologyComponent },
  { path: 'articles-javascript', component: ArticlesJavascriptComponent }
];

@NgModule({
  declarations: [],
  imports: [RouterModule.forRoot(routes)],
  exports: [RouterModule]
})
export class AppRoutingModule {}
Now we can format the navbar component by editing the navbar.component.html file:
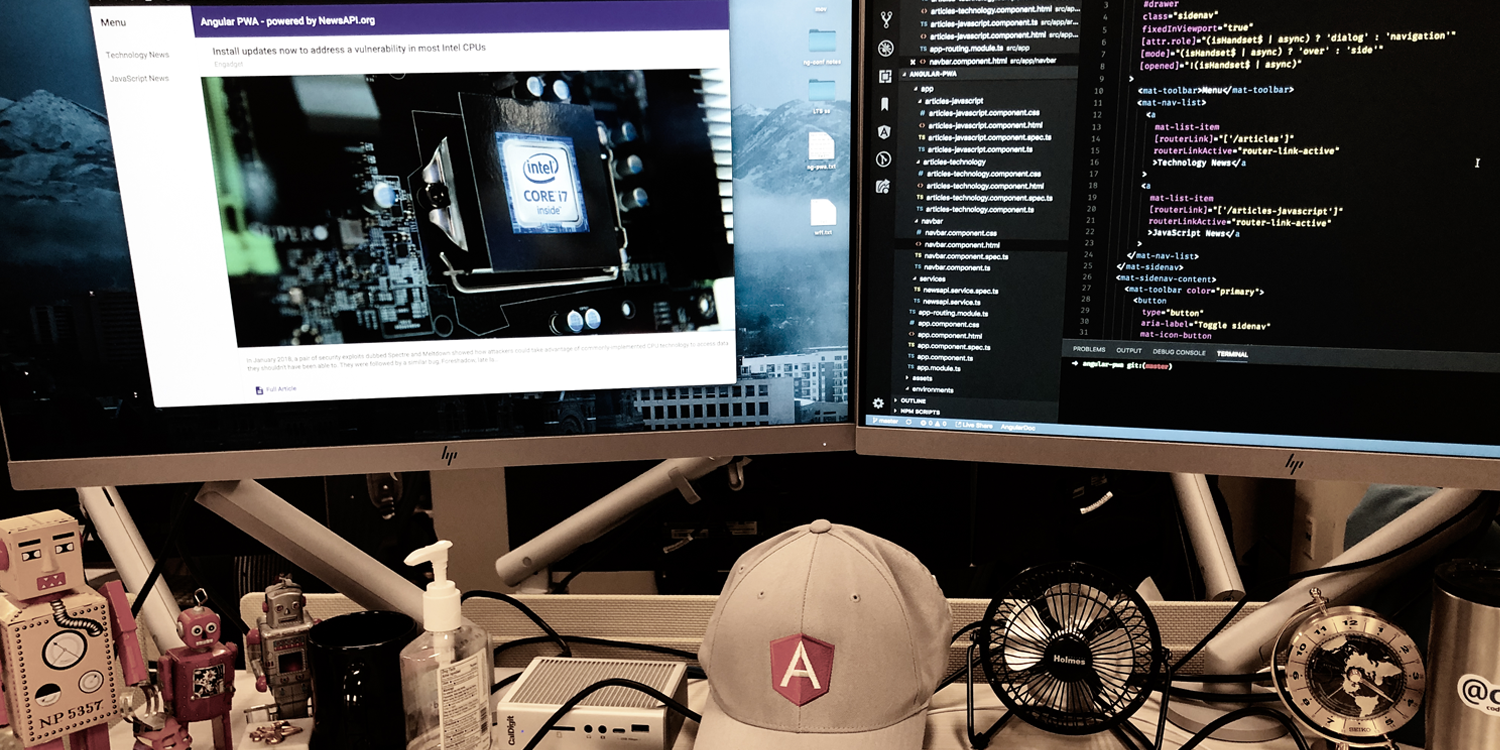
<mat-sidenav-container class="sidenav-container">
  <mat-sidenav
    #drawer
    class="sidenav"
    fixedInViewport="true"
    [attr.role]="(isHandset$ | async) ? 'dialog' : 'navigation'"
    [mode]="(isHandset$ | async) ? 'over' : 'side'"
    [opened]="!(isHandset$ | async)"
  >
    <mat-toolbar>Menu</mat-toolbar>
    <mat-nav-list>
      <a
        mat-list-item
        [routerLink]="['/articles']"
        routerLinkActive="router-link-active"
        >Technology News</a
      >
      <a
        mat-list-item
        [routerLink]="['/articles-javascript']"
        routerLinkActive="router-link-active"
        >JavaScript News</a
      >
    </mat-nav-list>
  </mat-sidenav>
  <mat-sidenav-content>
    <mat-toolbar color="primary">
      <button
        type="button"
        aria-label="Toggle sidenav"
        mat-icon-button
        (click)="drawer.toggle()"
        *ngIf="isHandset$ | async"
      >
        <mat-icon aria-label="Side nav toggle icon">menu</mat-icon>
      </button>
      <span>Angular PWA - powered by NewsAPI.org</span>
    </mat-toolbar>
    <router-outlet></router-outlet>
    <app-articles-technology></app-articles-technology>
  </mat-sidenav-content>
</mat-sidenav-container>
In the navbar.component.html we set our content to be the articles-technology component. So, go back into the app.component.html file and remove the code we added earlier and replace it with our navbar:
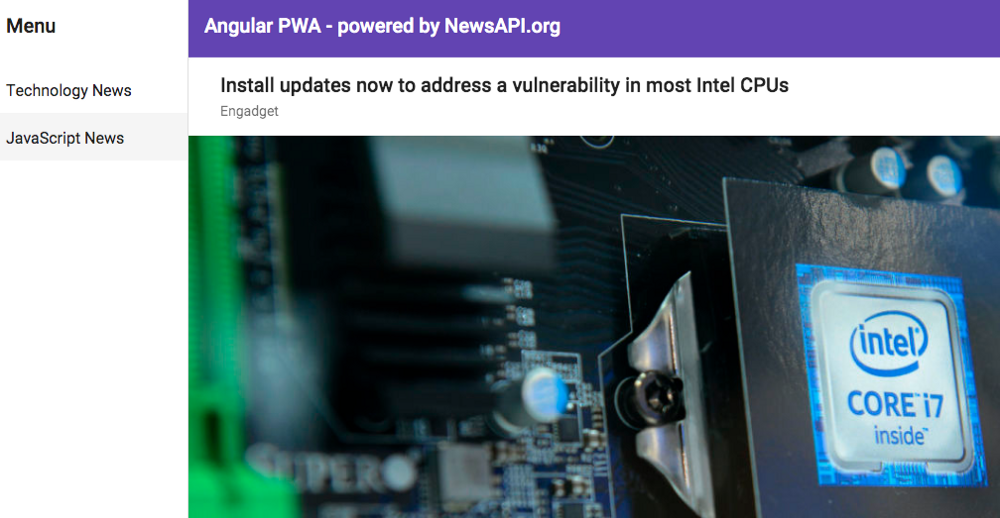
<app-navbar></app-navbar>Check your browser to see the app is running with navigation to Technology News and JavaScript News.
Build the PWA
Now that we have a functioning app — let’s make it a PWA! Go to your terminal and run:
ng add @angular/pwa --project angular-pwaAngular CLI will take care of a few things to setup our Angular application to be a PWA. It will:
- Add the @angular/service-worker package to our app.module.ts file imports:
import{ ServiceWorkerModule } from ‘@angular/service-worker’;
@NgModule({ ..
 imports: [ …
 ServiceWorkerModule.register(‘ngsw-worker.js’, { enabled: environment.production })
] …- Create two files in the src directory: manifest.json and ngsw-config.json
and add manifest.json in the registered assets of our app in the angular.json file.
“assets”: [
“src/favicon.ico”,
“src/assets”,
“src/manifest.json”
]- Update our index.html file with a link to manifest.json and meta tags for theme-color.
<link rel=”manifest” href=”manifest.json”>
<meta name=”theme-color” content="#1976d2">
If you ever want to change the theme color you’ll need to change it in both the index.html and the manifest.json files.
Alright — lets build our PWA. In your terminal run:
ng build --prodNotice the new dist directory that was added to our project.
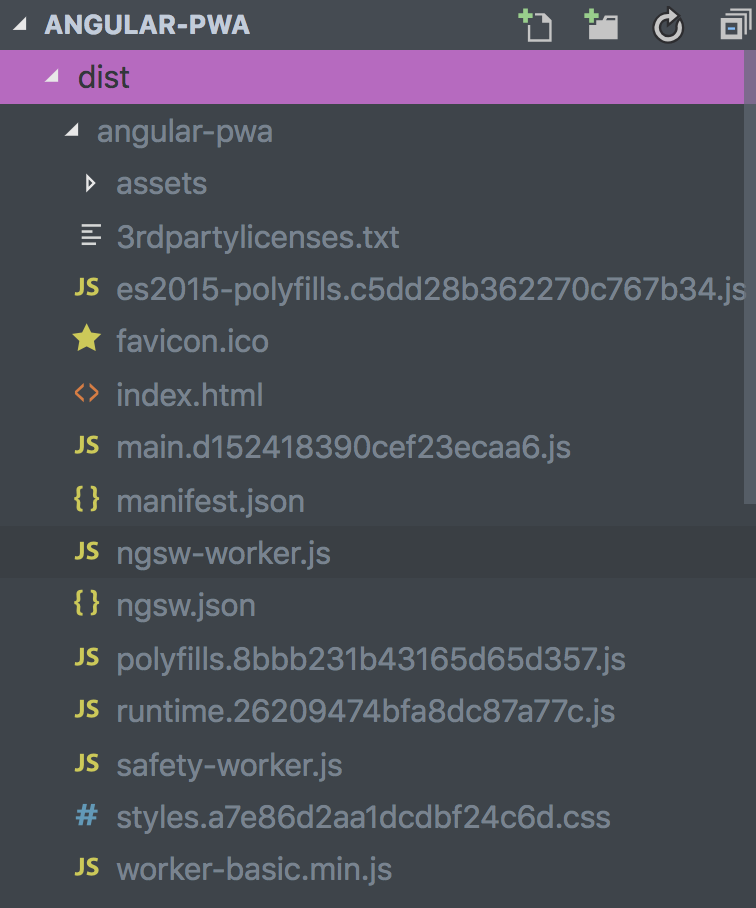
The build created our service workers and everything else our app needs to be a PWA. To see it in action, we’ll need to serve it from an http-server because service workers don’t work with ng serve.
To install http-server globally, go to your terminal and run:
npm i -g http-serverand then launch the PWA by running:
http-server -p 8080 -c-1 dist/angular-pwaNow go checkout our PWA at: http://127.0.0.1:8080
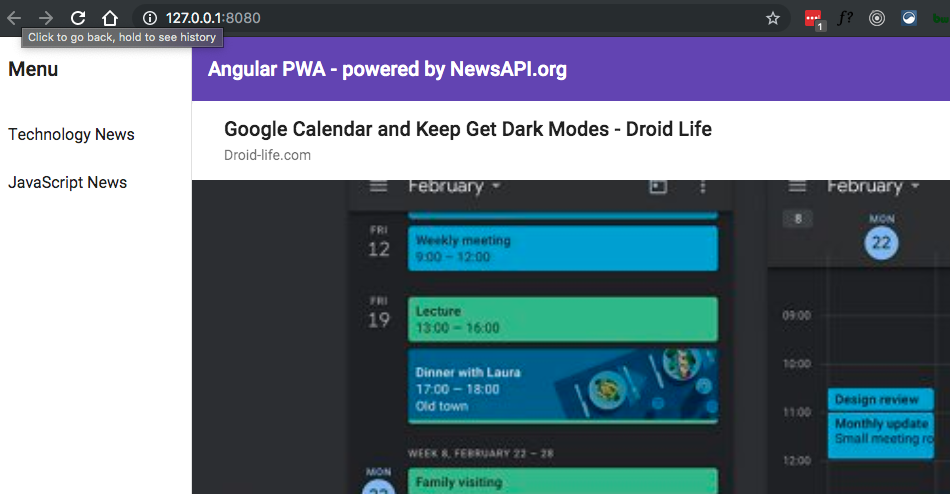
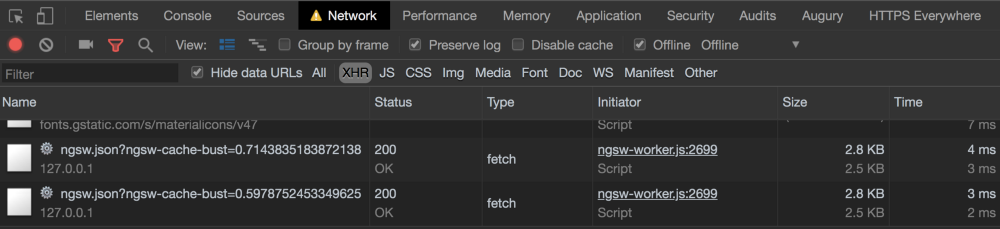
Open up your browser Dev tools, and in the Network Tab choose Offline then refresh the page. Our PWA is still serving up content thanks to the service worker cache!
Deploy the PWA on Netlify
Okay, we built a PWA with Angular but what’s the point if we don’t get it onto our mobile device? To do that, let’s use Netlify.

Netlify is a cloud based hosting company that quickly deploys static websites with continuous deployment from a git repository.
The first thing to do is make a repository from your code on GitHub, GitLab, or BitBucket. Then head over to Netlify and sign up using your git service. They have a Free tier for experiments like this tutorial.

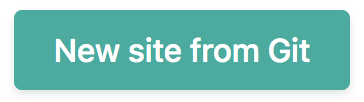
Login and click on New site from Git button.
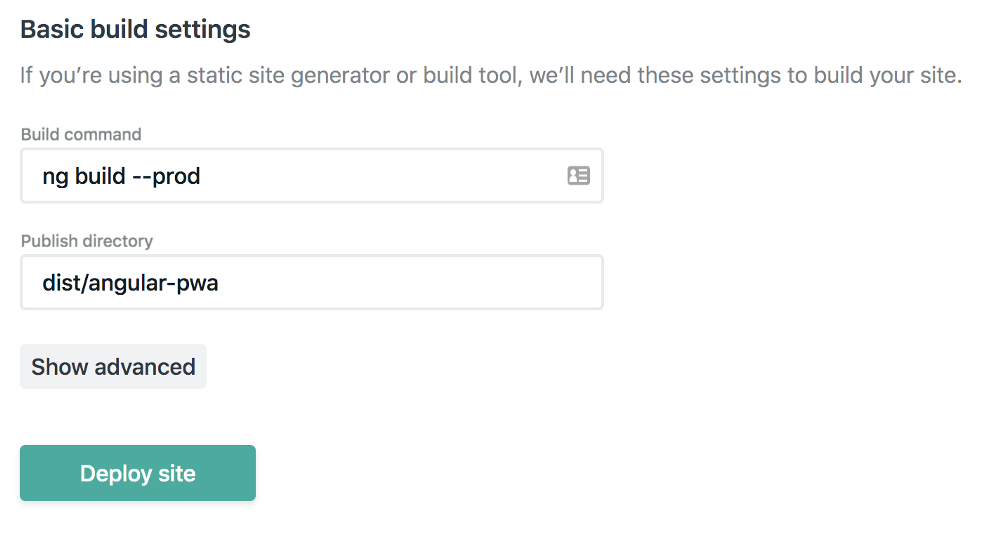
Add your repository and enter ng build --prod as the build command and dist/angular-pwa as the publish directory — then click the Deploy site button.
When the deploy is finished, you’ll get a URL you can open on your smartphone to view your PWA. Save it to your home screen to save an icon to your creation.

I hope you found building a PWA with Angular with this tutorial as useful and fun as I did. If you have any comments or questions let me know here or send me a tweet. Thanks and happy coding!
Very interesting article here. thanks for sharing!
Hurrah, that’s what I was seeking for, what a stuff!
present here at this webpage, thanks admin of this web site.
I don’t even know the way I stopped up here, however
I assumed this post was once great. I don’t recognize who you might be
but definitely you are going to a famous blogger for those who are
not already. Cheers!